EZ-FLASH OMEGA SIMPLE THEME USER MANUAL
This document will be updated frequently with software updating
The author's native language is not English. There may be grammatical errors in the document. We have done our best to translate and correct.
The current document applies to Kernel 1.06 fw 7, Simple v3.42.
Greetz:
EZ-Flash
Kuwanger
Veikkos
Moonlight
Sasq
DarkFader
CoolHJ
Let's Emu!
Dwedit
FluBBa
Loopy
The HiVE
James Jacobs
- EZ-FLASH OMEGA USER MANUAL
Before everything starts
We want to let you know EZ-FLASH OMEGA uses a new save technology that is different from the battery save used in previous products.
This technology requires you to slightly change the traditional usage habits, just wait a bit after saving, so that data can be written to MicroSD.
We hope this little inconvenience will not cause too much trouble for your experience.
After all, no battery is needed to save data. Never worry about losing save data due to dead battery.
First step
Please visit the download section on the official site.
http://www.ezflash.cn/download
There are kernel, thumbnails pack, cheat library for EZ-FLASH OMEGA.
Download files.
Format your MicroSD card with proper format and suggested cluster.
card size ≤ 2 GB    FAT/FAT16   32KB
card size ≤ 32 GB   FAT32       32KB
card size ≤ 128 GB  exFAT       32KB or Larger
Or you can use the Official SD card formatter to do it automatically. Click here to download
Extract the package to the root folder of MicroSD card. Please note that when decompressing, do not use
extract to folder to avoid folder nesting.
Confirm there are two folders which named IMGS and CHEAT in SYSTEM,
and a file name EZKERNEL.BIN on the root folder.
Copy your game roms to MicroSD card.
Update the kernel
Choose which kernel you want, either the light theme (ezkernel-light.bin) or the dark theme
(ezkernel-dark.bin).
Rename the kernel you want to ezkernel.bin. When booting your Game Boy Advance, hold the R
button. The system will boot up after the update process done. The kernel version is displayed on the bottom
right corner of System Setting. DO NOT TURN OFF THE POWER WHEN UPDATING!!
If the firmware version is lower than kernel contained, it may need to update automatically. The new firmware needs the game console reboot to take effect. DO NOT TURN OFF THE POWER WHEN UPDATING!!
Basic Operation
-
Press
LandRto toggle between SD Card, NORFlash, Settings, and Help. -
Press
Aon a ROM to popup launch menu. -
Press
↑or↓in launch menus to select different launch option, and pressAagain to confirm. PressBto dismiss launch menu. -
Press
←or→to turn the page in file browser.
Hotkeys
Hotkeys only work in the SD Card tab.
Recent played games list
Press START in SD Card tab will popup Recent played games list.
More options
In SD Card tab, press SELECT to open a menu with some more options. Currently, you
can toggle the game thumbnails.
No cold start
In SD Card tab, press A to popup the launch menu, highlight the CLEAN BOOT, then
press L+A to launch the selected game without the cold start.
Not having a cold start will perform a soft reset instead of Hard Resetting the console.
Delete file
In SD Card tab, select a file and press L+START will popup a windows
to confirm deleting a file. Use it at your own risk.
Launch menu on SD card
Clean Boot
Launch the game without any function.
Boot With Addon
Launch the game with functions which enabled in system.
Write To NOR Clean
Write selected game to NORFlash without any extra function.
Write To NOR Addon
Write selected game to NORFlash with extra functions which enabled in system. Cheat must selected before write and not changeable after be written.
Save Type
This option is usually used with fan translated games, most of them are patched to other save mode instead
original save type, it will cause AUTO mode failed to identify the correct save mode. Once you encounter the
save issues when playing fan translated games, please use ← and → to toggle the
save type.
Under normal circumstances just leave it in AUTO.
Cheat
This function only works with the CHEAT folder which you download the cheat library and extract
it on the microSD.
The CHEAT option will be visible if there is a correspond cheat file in the cheat library.
Press A to enter cheat selection interface.
Use ↑ and ↓ to select cheat item, Press A to toggle.
Use ← and → to turn the page.
Press B when cheat selection is completed.
The highlighted option will be changed to the Boot With Addon option. Press A to
launch game with cheat.
Press L + R + START when playing game to popup in-game menu.
Select CHEATON and press A to enable cheat.
Select CHEATOFF and press A to disable cheat.
The cheat library is collected from the Internet, we provide it only for the convenience of the users. It may have the wrong cheat code which may cause cheating to fail or games to simply crash.
User can put a .cht file which have same file name with game into /SYSTEM/CHEAT folder to
override the cheat library.
mario.cht <==> mario.gba
NORFlash
Direct Boot
Launch game, if game was written by Write To NOR Addon, it will equal
Boot With Addon
Delete
Select the last game in the list and choose this option will delete the game from NORFLASH, otherwise a warning will be occurred.
Format
Erase the whole NORFLASH completely. it will cost 4 minutes to be done. use it with caution. DO NOT TURN OFF THE CONSOLE POWER WHEN FORMATTING, IT WILL DAMAGE THE NORFLASH.
In Game Menu
When playing game with BOOT WITH ADDON, press L + R +
START can active the in game menu, the menu contents are depended on which functions enabled in
the system. Press ↑ and ↓ to select function, press A to confirm. The
hotkey can be change in system.
QUIT
Reset game immediately to the kernel interface.
If only RESET enabled in system, the in game menu hotkey will be the RESET hotkey
SAVE
Save the games states to the RTS folder on SD card.
LOAD
Load the games states from the RTS folder on SD card.
CHEATON
Enable the selected cheat items.
CHEATOFF
Disable the the selected cheat items.
Pogoshell
Included File Types
.bmp: Windows Bitmap Image
.gg: Sega Game Gear ROM File
.col: ColecoVision ROM File
.jpg/.jpeg: JPEG Image (YUV411, YUV111 or YUV100 formatted)
.mod: ProTracker Module
.ngc/.ngp/.ngpc: Neo Geo Pocket ROM File
.pce: NEC PC-Engine/TurboGrafx-16 ROM File
.rom: MSX ROM File (Not a .DSK)
.sg: Sega SG-1000 ROM File
.sc: Sega SC-3000 ROM File
.sms: Sega Master System ROM File
.sv: Watara Supervision ROM File
.ws/.wsc: WonderSwan ROM File
.z80: ZX Spectrum Z80 Snapshot
.txt: Text Document
.pcx: ZSoft Paintbrush PCX Image
.c8: RCA CHIP-8 ROM
.arc: Emerson Arcadia 2001 ROM
.nsf: NSF Format Music (2A03 Only)
.k3m: Krawall Advance Music
.bgf: BoyScout Module
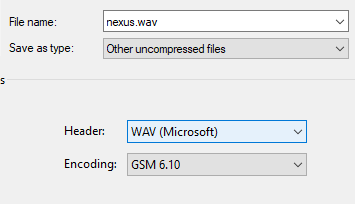
.wav: Wave Format Sound (GSM 6.10 format)
.vgm: SMS/GG VGM Music
.sb: MaxMod Soundbank
.mda: Sharp X68000 Music
.cwz: [Unknown] Music File
Plugins
Every single extension listed above is controlled by a file known as a Pogoshell plugin.
If you want to add or make plugins of your own, the filename has to be the extension that it uses in
/SYSTEM/PLUG
Playing ColecoVision ROMs
1. Download the Cologne package here: https://www.zophar.net/download_file/16422
2. Take a blank file and the BIOS (You have to find the BIOS yourself).
3. Compile the Cologne ROM with the Executable in the zip file.
4. Rename the created file to col.gba and place it in the /SYSTEM/PLUG directory.
If done correctly, you should now be able to play ColecoVision ROM files (.col)
These are placed in the /SYSTEM/PLUG directory.
The Extra Settings Menu
Pressing the SELECT button in the SD Card menu will open up a menu.
There are four options there. Thumbnail, reset, backup, and bold.
Thumbnail will toggle whether or not you want to see the thumbnail of GBA Games.
Reset will toggle the hard reset when you launch a game. If you hold L while this is turned on, it will not perform the hard reset. If the option is off, holding L will perform a hard reset.
Backup will toggle the Save backup feature. This feature is to ensure you don't lose all of your saves when your SD card will inevitably become corrupted due to a flaw in the way saving works.
Bold will make the text bolded for ASCII characters. This may help for people who are nearsighted.
Converting Wave Files
This will require Audacity or other audio manipulation software.
Step 1:

Step 2:
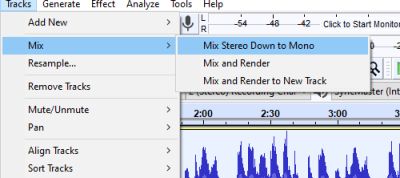
Step 3:

Step 4:
Converting JPEG Images
This requires the tool that is included with the package.
Step 1: Go into the tools folder

Step 2: Double click the ps2jpg_linker.exe

Step 3: Select the bottom option
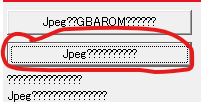
Step 4: Choose your image
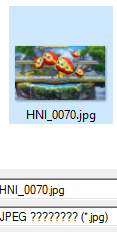
Step 5: Click the option on the right
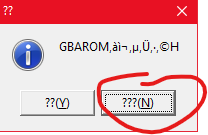
Step 6: Your converted image should be [imagename]_enc.jpg
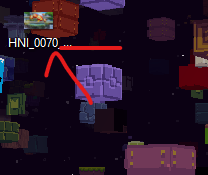
Plugin usage
The .wav file plugin
When launching a .wav file, you should see a screen that looks like this.
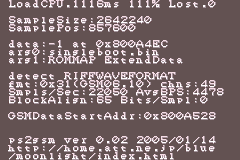
Due to the way this plugin was programmed, you cannot really do anything other than exit to the EZ-Flash Menu.
The JPEG file plugin
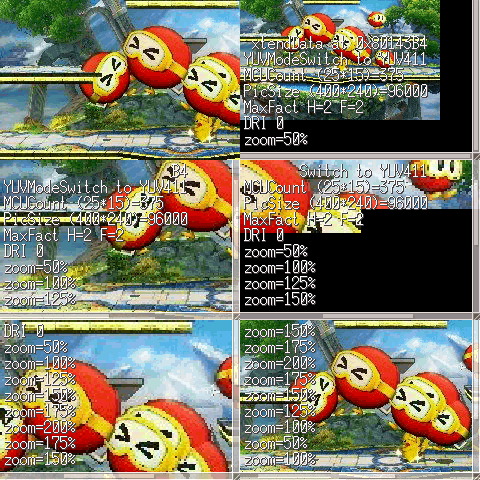
When viewing a JPEG image, the image will begin drawing in chunks, kinda like Minecraft blocks.
Controls:
A Button: Zoom out
B Button: Zoom in
D-Pad: Scroll image
START Button: Re-draw image
L+R: Quit
The text reader plugin
Unfortunately, this plugin is all in Japanese, and there is nothing I can do about it.
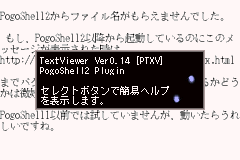
However, I can tell you all that you need to know.
Controls:
A Button / Down: Scroll Down
B Button / Up: Scroll up
Left / Right: Previous/Next Page
START Button: Menu
L+R: Quit
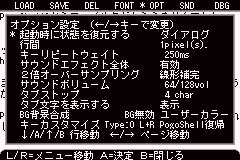
In the previously aforementioned menu, you can use:
L / R: Next Tab
Up / Down: Select
A Button: Confirm choice
B Button: Cancel
Left / Right: Change Setting
System Settings
Use ↑ and ↓ to select option, press A to confirm.
Time
Use ← and → to select time elements, ↑ and ↓
change the value, select OK and press A to save the time.
Addon
Use ↑ ← ↓ → to select options, press
A to toggle them, select OK and press A to save.
Since the 1.04 kernel, check the save-states solely (other items are not checked) to enable the new save-states mode without invoking the in-game menu, and the compatibility is higher. When this feature is activated, the following sleep hotkeys and menu hotkeys become the save and load hotkeys for the save-states.
Language
Use ← and → to select language, press A to save.
Fast Patch Engine
This option is enabled in default under normal circumstances. unless you want to use
BOOT WITH ADDON with fan translated rom or other heavily modified rom.
Turn off this option will turn to use the manual patch engine. The patching time will be
increased.
Sleep Key
Press this hotkey will turn the console in sleep mode when playing game.
Press Select + Start to wake up the console. This hotkey is
unchangeable.
Use ← and → to select, ↑ and ↓ change the
key, select OK and press A to save. DO NOT USE OPPOSITE
KEY IN SAME TIME, LIKE UP AND DOWN.
Consider the console is still draining the battery in sleep mode. we suggest use the save states and turn off console.
Addon Key
This is the in game menu hotkey, also the reset hotkey if only RESET enabled.
Use ← and → to select, ↑ and ↓ change the
key, select OK and press A to save. DO NOT USE OPPOSITE
KEY IN SAME TIME, LIKE UP AND DOWN.
Game RTC
If you are not playing RTC games, you can turn off this function to reduce more power consumption. unticked=off
Definitive Edition
Please read the document here for information about your cartridge.
EZ-FLASH OMEGA Definitive Edition
Manual
Help
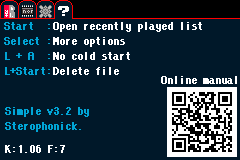
Here are some of the features shortcut keys and a qrcode which is linked to this document.
IMPORTANT NOTE
-
Please wait at least 2-3 seconds after in-game save behavior, then power off the game console or reset game. Because the cache mechanism of NAND on microSD needs time to write data properly. Turn off the console or reset game too fast may cause your save data lost because writing process interrupted. The GBC/NES emulator also need to wait 2-3 seconds after you press L + R, this operation will call up a save action, same theory as above. wait some time then choose exit.
error code
1  game rom error
2  saver folder error
4  save file error
5  create file error
Fast turn off console or reset game when saving and fast exit emulator will cause the data damaged and microSD card FAT error. that's why you encounter the error code above.
You can use disk-scan application to fix the microSD card, or format it again.
The best way is counting one to five in your mind after saved the game, then turn off game console or reset game.
Which conditions need the counting?
Saved in the game Saved game states Press L + R in emulator before exit -
Sound turn to noise after load game states: The sound register of GBA hardware is write only, it can not be saved and restored. Change a scene should get the sound normally. But there are some game exceptions, the sound will never return to normal. This is a limitation of the GBA hardware itself and it is not a defect of this product.
-
Please use the
press L+R then exitoption in emulator to keep the saver which you saved in game, instead of shutting down directly after saved game in emulator. -
Starting from kernel 1.04, the battle field auto-save in the Fire Emblem series are removed, please use manual battle field save and chapter save point.